1- Ergonomic Crochet Hooks: Your Hand’s New Best Friend
Let me tell you, folks, I’ve been down the crochet rabbit hole for years now. And boy, oh boy, did I learn the hard way about the importance of ergonomic crochet hooks. Remember that time I stayed up all night working on a blanket for my niece’s birthday? Yeah, my hands sure do. I couldn’t feel my fingers for days!
The Game-Changing Benefits of Ergonomic Hooks
So, what’s the big deal with these fancy-schmancy ergonomic hooks anyway? Well, let me break it down for you:
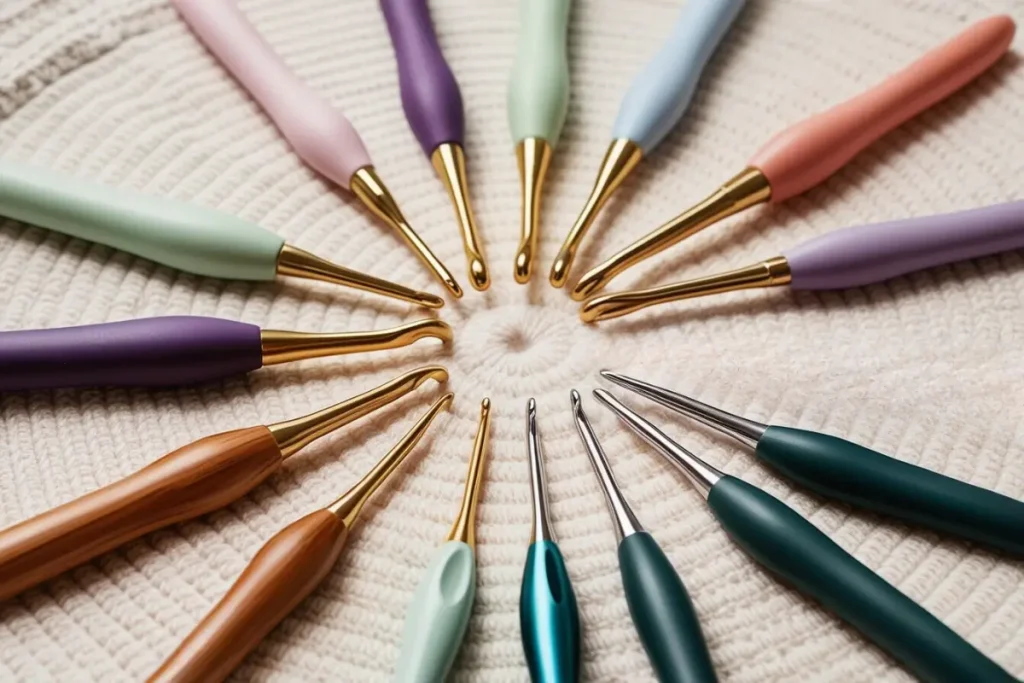
- Comfort that lasts: These babies are designed to fit snugly in your hand, reducing strain during those marathon crochet sessions.
- Say goodbye to cramping: The ergonomic shape distributes pressure more evenly, so you can kiss those nasty hand cramps goodbye.
- Speed demon: With a more comfortable grip, you might find yourself crocheting faster than ever before.
- Arthritis-friendly: If you’re dealing with joint pain, ergonomic hooks can be a real lifesaver.
Pro Tip: Don’t wait until you’re in pain to switch to ergonomic hooks. Prevention is key, people!
Top Brands and Materials: The Good, The Bad, and The Plasticky
Now, I’ve tried more hooks than I care to admit. Some were great, others… not so much. Here’s the lowdown on materials:
- Aluminum: Slick and fast, but can be cold to the touch.
- Bamboo: Eco-friendly and warm, but can snag on some yarns.
- Plastic: Lightweight and cheap, but not always durable.
As for brands, I’ve had great luck with Clover Amour and Furls. But honestly, it’s like finding the perfect pair of jeans – you gotta try ’em on to know for sure.
Size Matters: Choosing the Right Hook for Double Crochet
When it comes to double crochet, you’ve got options, my friends. Here’s a handy-dandy table to help you out:
| Yarn Weight | Recommended Hook Size |
|---|---|
| Sport | 4.0mm – 5.0mm |
| Worsted | 5.5mm – 6.5mm |
| Bulky | 8.0mm – 9.0mm |
Remember, these are just guidelines. Don’t be afraid to rebel a little and find what works for you!
Features to Look For: The Devil’s in the Details
Alright, let’s get down to the nitty-gritty. When you’re shopping for ergonomic hooks, keep an eye out for these features:
- Grip: Look for a hook with a cushy, non-slip grip. Trust me, it’s a game-changer.
- Thumb rest: This little indentation can make a world of difference in your comfort level.
- Inline vs. tapered: This refers to the shape of the hook itself. Inline hooks have a more uniform shape, while tapered hooks have a more pronounced point. I personally prefer inline for most projects, but it’s really a matter of personal preference.
The Great Debate: Inline vs. Tapered
Okay, so here’s where things get a bit controversial in the crochet world. Some swear by inline hooks, others won’t touch anything but tapered. Me? I’m Switzerland. I use both depending on the project and my mood.
Inline hooks are great for maintaining consistent tension, while tapered hooks can be easier to insert into tight stitches. It’s like choosing between chocolate and vanilla ice cream – they’re both delicious in their own way!
Look, at the end of the day, finding the right ergonomic crochet hook is a journey. Don’t be discouraged if the first one you try isn’t perfect. It took me years to find my ride-or-die hooks, and I’m still experimenting.
Remember, your hands are your most important crochet tools. Treat them right, and they’ll keep creating beautiful things for years to come. Now go forth and crochet, my friends! Your hands will thank you.
2- Stitch Markers: Never Lose Your Place Again
Oh boy, do I have a story for you about stitch markers! Picture this: it’s 2 AM, I’m knee-deep in a gorgeous double crochet blanket pattern, and suddenly… I’ve lost my place. Cue the frustrated sighs and maybe a tear or two. Sound familiar? If you’ve been there (and let’s be honest, we all have), then stick around, because stitch markers are about to become your new best friends.
Why Stitch Markers are a Double Crochet Game-Changer
Listen, I used to think I was too cool for stitch markers. “I can keep track in my head,” I’d say, puffing out my chest like some crochet superhero. Spoiler alert: I couldn’t. Here’s why these little lifesavers are crucial for double crochet patterns:
- Pattern Repeat Reminders: They’re like little signposts saying, “Hey, remember to do that cool stitch combo here!”
- Row Counters: No more squinting at your work, trying to count rows. Just pop a marker every 10 rows and thank me later.
- Stitch Counters: Keeping track of increases or decreases? Stitch markers have got your back.
- Joining Hints: When you’re working in the round, they’re perfect for marking where to join.
Pro Tip: Always place your stitch marker in the last stitch of a row or round. Future you will be so grateful!
Types of Stitch Markers: Choose Your Fighter
Not all stitch markers are created equal, folks. Let’s break down the contenders:
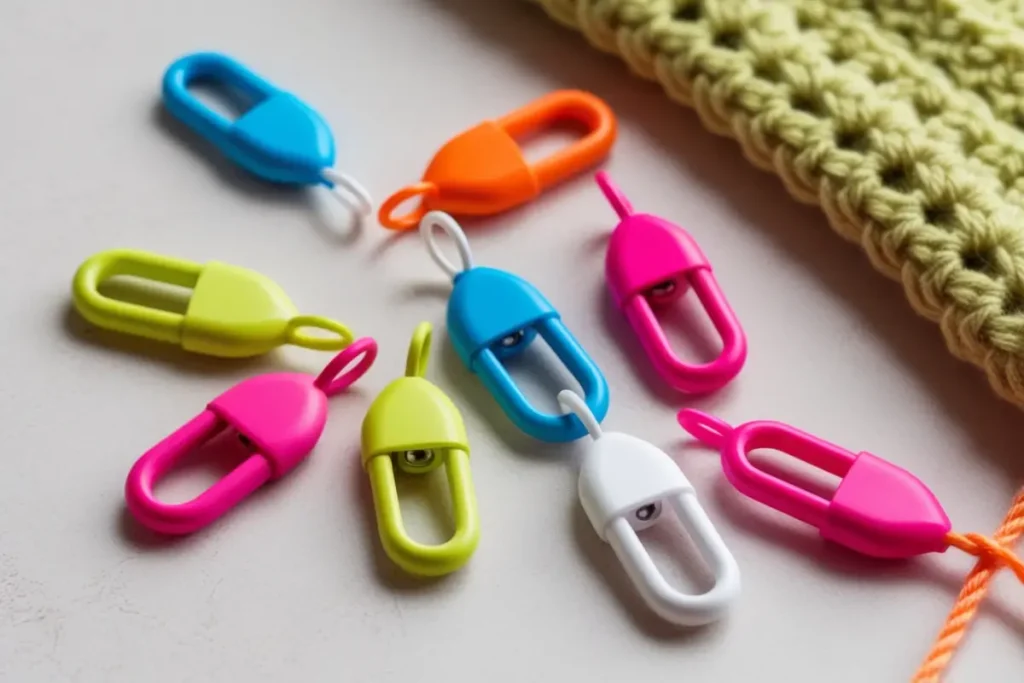
- Locking Stitch Markers: These bad boys are my personal faves. They’re like tiny plastic safety pins that lock shut. Perfect for when you don’t want anything slipping out of place.
- Split-Ring Markers: Think of these as jewelry for your crochet. They’re usually metal and slide right onto your stitch. Great for thinner yarns.
- Clip-On Markers: These are the new kids on the block. They clip onto your work instead of going through it. Super handy for bulky yarns or when you need to mark a section rather than a single stitch.
Beyond the Basics: Creative Uses for Stitch Markers
Alright, time for some big brain energy. Stitch markers aren’t just for marking stitches (mind-blowing, I know). Check out these cool ideas:
- Color Coding: Use different colors to mark different pattern sections. It’s like a roadmap for your project!
- Bobble Guides: Place them where you need to make bobbles. No more squinting at your pattern every two seconds.
- Decrease Markers: Pop one in before you decrease. It’s like a little “heads up” for your hook.
- Stitch Holders: In a pinch, they can hold a few stitches if you need to rip back.
Eco-Friendly and DIY Stitch Marker Options
Now, I know what you’re thinking. “But what about the environment?” Don’t worry, I’ve got you covered. Here are some eco-friendly options that’ll make Mother Nature proud:
- Scrap Yarn Loops: Just tie a small loop with some scrap yarn. Bonus: color-code to your heart’s content!
- Paper Clips: Bend them slightly, and voila! Instant stitch marker.
- Jump Rings: These little jewelry findings make perfect split-ring markers.
- Rubber Bands: Cut them in half for a quick and stretchy marker option.
The Great Stitch Marker Debate: To Buy or DIY?
Here’s the thing: store-bought markers are great. They’re durable, come in cute shapes (I may or may not have sheep-shaped ones), and are ready to go. But DIY markers? They’ve got charm, they’re cheap as chips, and you probably already have the materials lying around.
Me? I’m a mixed bag. I’ve got my trusty store-bought locking markers, but I’m not above using a twist-tie from a bread bag in a pinch. It’s all about what works for you and your project.
Remember, folks, the best stitch marker is the one you’ll actually use. So whether you’re Team Store-Bought or Team DIY, just make sure you’re using them. Trust me, your sanity (and your projects) will thank you.
Now, go forth and mark those stitches! And if you see me at 2 AM, wide-eyed and surrounded by unmarked crochet chaos… mind your business. I’m still learning too!
3- Yarn Winders: Tangle-Free Crochet Heaven
Okay, picture this: It’s a cozy Sunday afternoon, you’re all set for a crochet marathon, and BAM! Your yarn decides to turn into the world’s most frustrating knot. Been there, done that, bought the t-shirt (and probably crocheted a sweater to go with it). But folks, let me introduce you to the game-changer that is the yarn winder. Trust me, it’s about to rock your crochet world!
Yarn Winders: The Unsung Heroes of Crochet
So, what’s the big deal about yarn winders? Oh honey, let me count the ways:
- Tangle-free yarn: Say goodbye to yarn barf! (Yeah, that’s a real term. Look it up!)
- Consistent tension: Your stitches will thank you for the even pull.
- Space-saving: Those neat little cakes take up way less room than floppy skeins.
- Portability: Toss a cake in your bag without fear of a yarn explosion.
Pro Tip: Always leave a tail hanging out when you wind your yarn. Future you will be so grateful when it’s time to start a new project!
But here’s the kicker – yarn winders don’t just make your life easier, they make it faster too. I swear, ever since I got my winder, my projects have been flying off the hook. It’s like my crochet is on steroids (the legal kind, of course).
Manual vs. Electric: The Great Yarn Winder Showdown
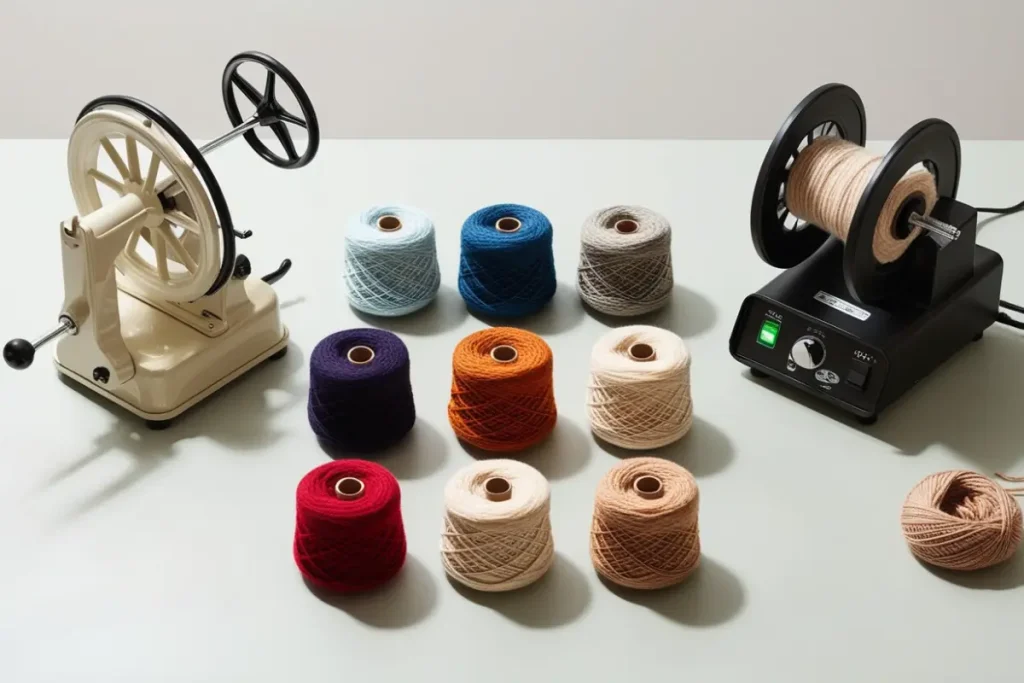
Now, let’s talk about the two contenders in the yarn winder ring: manual and electric. It’s like choosing between a bicycle and a motorcycle – they’ll both get you there, but the ride is different.
Manual Yarn Winders: The OG
Pros:
- Cheaper (your wallet will high-five you)
- No need for electricity (perfect for crochet-camping… is that a thing?)
- Great arm workout (who needs the gym when you have yarn?)
Cons:
- Can be slow for big projects (patience is a virtue, right?)
- Might require some coordination (if you’re clumsy like me, watch out!)
Electric Yarn Winders: The New Kid on the Block
Pros:
- Fast as lightning (Usain Bolt has nothing on these babies)
- Consistent tension (even when your arm gets tired)
- Great for large amounts of yarn (hello, blanket projects!)
Cons:
- More expensive (start saving those pennies)
- Needs electricity (not ideal for crochet-camping… still not sure if that’s a thing)
- Can be noisy (maybe not the best for secret midnight crochet sessions)
The Joy of Center-Pull Yarn Cakes
Let’s talk about the real MVP here – the center-pull yarn cake. It’s like the crochet gods looked down and said, “You know what? These crafters deserve better.”
-
- No rolling yarn balls: Your yarn stays put, no chasing it across the room (or fighting your cat for it).
-
- Consistent tension: The yarn pulls smoothly from the center, no tight spots or loose areas.
-
- Space-saving storage: Stack those cakes like pancakes, baby!
-
- Easy to start: No more digging for the center of the skein. The end is right there waiting for you!
I swear, once you go center-pull, you never go back. It’s like upgrading from dial-up to high-speed internet. You’ll wonder how you ever lived without it.
Choosing Your Perfect Yarn Winder: A Buyer’s Guide
Alright, so you’re sold on the idea of a yarn winder (smart cookie!). But how do you choose the right one? Here are some tips from yours truly:
-
- Consider your project size: If you’re all about small projects, a manual winder might do the trick. But if you’re tackling afghans and sweaters, an electric model could save your sanity.
-
- Think about your space: Some winders can clamp onto a table, while others need to sit on a flat surface. Measure your crafting area before you buy!
-
- Check the yarn capacity: Most winders tell you how many ounces they can handle. Make sure it can tackle your chunkiest yarn.
-
- Look at the build quality: A winder is an investment. Check reviews and maybe splurge a little for one that’ll last.
-
- Don’t forget the swift: If you’re dealing with hanks of yarn, a swift is your winder’s best friend. They’re like the dynamic duo of the yarn world.
The Yarn Winder Learning Curve: Embrace the Mess
Here’s a little secret: your first few cakes might look more like lumpy potatoes than neat yarn cakes. And that’s okay! There’s definitely a learning curve with yarn winders. My first attempt looked like it had been wound by a tornado. But stick with it, adjust your tension, and soon you’ll be creating yarn cakes that would make a pastry chef jealous.
Remember, at the end of the day, a yarn winder is a tool to make your crochet life easier and more enjoyable. Whether you go manual or electric, cheap or splurge, the most important thing is that it works for you and your projects.
So go forth, my fellow crocheters! Embrace the yarn winder and say goodbye to tangled messes. Your hooks (and your sanity) will thank you. And hey, if you see me at the craft store, staring longingly at the fancy electric winders, just pretend you don’t know me. A crafter can dream, right?
4- Row Counters: Keep Track Like a Pro
Alright, crochet pals, gather ’round. It’s time we had a heart-to-heart about the bane of every crocheter’s existence: losing count of your rows. You know that feeling when you’re in the zone, hook flying, and suddenly you realize you have no clue what row you’re on? Yeah, been there, done that, frogged the project. But fear not! Row counters are here to save our sanity, one click at a time.
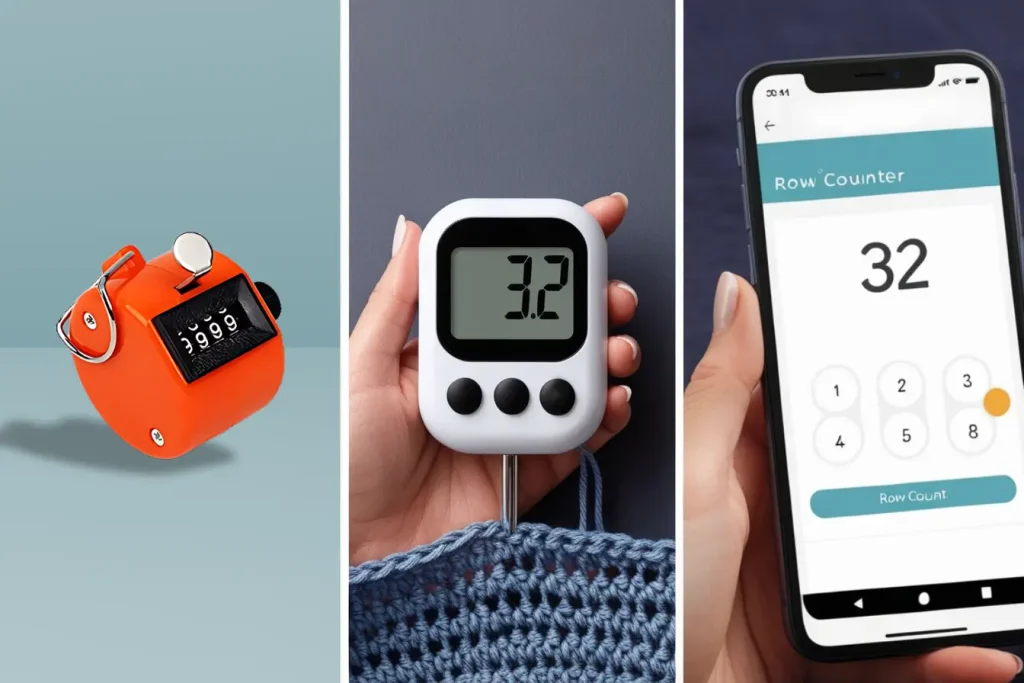
Digital vs. Mechanical: The Row Counter Showdown
Let’s break down the two main contenders in the row counter arena:
Mechanical Row Counters: The OG Clickers
Picture this: a little device that looks like it escaped from your grandma’s sewing box. That’s your mechanical row counter.
Pros:
- No batteries required (take that, planned obsolescence!)
- Satisfying click sound (oddly motivating, trust me)
- Sturdy and reliable (I’ve dropped mine more times than I care to admit)
Cons:
- Limited number range (usually up to 99)
- Can be accidentally reset (cue the dramatic “Nooooo!”)
- Not great for multiple project tracking
I’ll let you in on a secret: I named my first mechanical counter “Clicky.” We’ve been through a lot together, including that time I accidentally laundered it. (Pro tip: check your pockets before washing, folks!)
Digital Row Counters: The New Kids on the Block
Now, these are for all you tech-savvy crocheters out there. Think of them as the smartphones of the row counter world.
Pros:
Cons:
I splurged on a digital counter last year, and let me tell you, it was like upgrading from a flip phone to a smartphone. Mind. Blown.
App-Based Counters: For the Truly Tech-Obsessed
Okay, let’s take it up another notch. Did you know there are apps for counting rows? Welcome to the future, folks!
Some cool features:
-
- Multiple project tracking (because who has just one WIP, am I right?)
-
- Pattern integration (bye-bye, paper patterns!)
-
- Cloud syncing (switch devices without losing your count)
-
- Some even have voice control (for when your hands are full of yarn)
I tried an app-based counter once, and it was great… until my phone died mid-project. Let’s just say I now keep a backup mechanical counter in my project bag. Lesson learned!
Pro Tip: If you’re using an app, take a screenshot of your count before you close the app. Future you will thank past you when your phone decides to update and close all your apps!
Multi-Project Tracking: Because One Project is Never Enough
Let’s be real: if you’re anything like me, you’ve got more WIPs (Works in Progress) than you can shake a hook at. That’s where multi-project tracking comes in handy.
Digital and app-based counters often offer:
-
- Multiple independent counters
-
- Project naming or labeling
-
- Notes section for pattern details
It’s like having a personal assistant for your crochet addiction. I mean hobby. Definitely hobby.
Integrating Row Counters into Your Crochet Routine
Now, having a row counter is one thing. Actually remembering to use it? That’s a whole other ball game (or ball of yarn, in our case).
Here are some tips to make your row counter your new BFF:
-
- Make it visible: Keep that counter right next to your project. Out of sight, out of mind!
-
- Create a ritual: Just finished a row? Click that counter before you do anything else. Make it a habit.
-
- Use it for pattern repeats: Not just for rows! Use it to keep track of pattern repeats too.
-
- Double-check regularly: Every few rows, do a quick count to make sure your counter matches your work. Trust, but verify!
-
- Back it up: If you’re using a digital or app counter, jot down your count every so often. Technology is great until it isn’t.
The Great Row Counter Debate: To Count or Not to Count?
Here’s where I might ruffle some feathers: not everyone uses a row counter. gasp I know, shocking, right? Some crocheters swear by the “eyeball and hope” method, or use stitch markers every X number of rows.
Me? I’m Team Row Counter all the way. Sure, I can usually tell if I’m on row 20 or 21 just by looking. But row 120 or 121? Not a chance. Plus, there’s something so satisfying about clicking that counter. It’s like a little “atta girl” every row.
At the end of the day, whether you’re Team Mechanical, Team Digital, Team App, or Team Wing It, the most important thing is that you’re crocheting. These counters are tools to make our hobby more enjoyable, not to stress us out.
So go forth and count those rows! And if you see me at the craft store, obsessively clicking a row counter while staring at the yarn… no, you don’t. Mind your business. I’m “testing” it. For science. Yeah, that’s it. Science.
5- Blocking Mats and Tools: The Secret to Professional Finishes
Alright, crochet buddies, it’s time we had a little chat about the unsung hero of the crochet world: blocking. Now, I know what you’re thinking. “Blocking? Isn’t that just for knitters?” Oh honey, let me tell you, blocking is about to become your new best friend, especially for those gorgeous double crochet projects you’ve been slaving over.
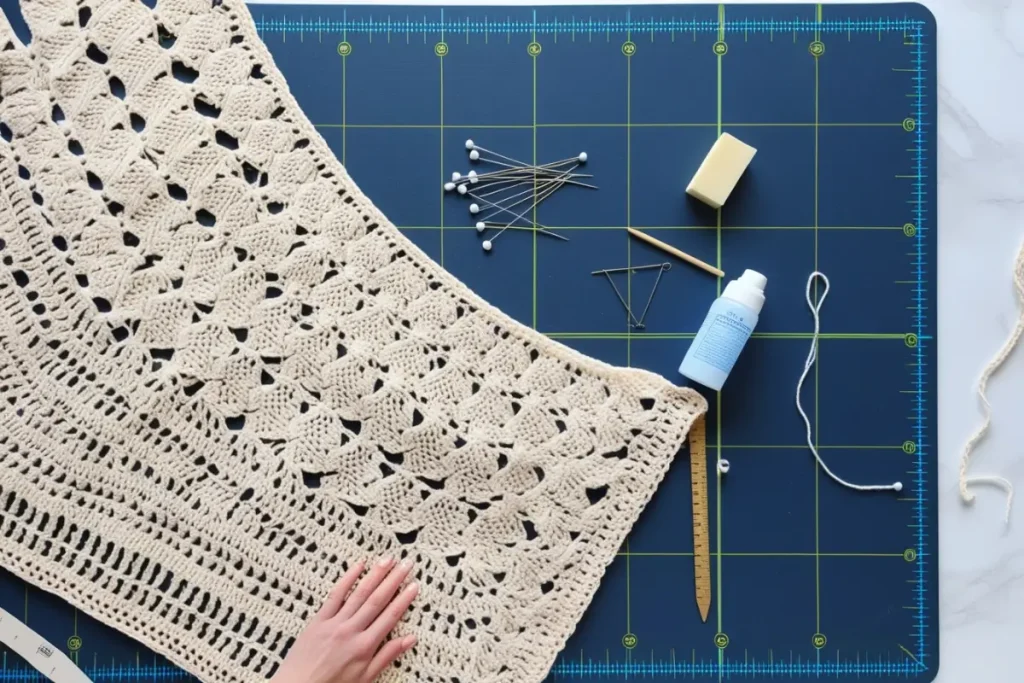
The Blocking Revelation: My Crochet Epiphany
Picture this: I’d just finished my first double crochet shawl. I was so proud… until I tried it on. It looked like a wadded-up tissue someone had tried to smooth out. Not exactly the elegant look I was going for. Then a wise old crocheter (okay, it was my neighbor, but she’s been crocheting longer than I’ve been alive) introduced me to the magic of blocking. Holy yarn balls, what a difference!
Why Blocking is a Double Crochet’s BFF
So why is blocking so crucial, especially for double crochet projects? Let me count the ways:
-
- Even stitches: It smooths out those little inconsistencies in tension. We’re all human, after all!
-
- Proper shaping: Ever made a “square” that looked more like a rhombus? Blocking fixes that.
-
- Drape: It gives your project that professional, flowy look. No more stiff, cardboard-like fabric!
-
- Stitch definition: Makes those beautiful double crochet stitches pop!
-
- Size adjustment: Didn’t quite hit the dimensions in the pattern? Blocking can help with that too!
Pro Tip: Always, always, ALWAYS check your gauge and block your gauge swatch. Future you will thank past you when your project actually fits!
Blocking Mats: Your Project’s Spa Day
Now, let’s talk about the foundation of good blocking: your mats. Think of these as the massage table for your crochet project’s spa day.
Interlocking Foam Mats: The Versatile Veteran
These are like the Swiss Army knife of blocking mats. They’re:
-
- Affordable (your wallet will thank you)
-
- Easy to store (perfect for small spaces)
-
- Customizable (make them as big or small as you need)
I started with these, and let me tell you, they’ve seen some things. Including that time I accidentally used permanent marker to grid them. Pro tip: don’t do that.
Heat-Resistant Mats: The Fancy Pants Option
For those of you who like to live dangerously (or just use a lot of wool), heat-resistant mats are your new best friend. They’re great for:
-
- Steam blocking (no melted foam here!)
-
- Ironing directly on the mat (hello, crisp edges!)
-
- Durability (these babies last forever)
I splurged on a set last year, and oh my yarn, it was a game-changer. Especially for those delicate lace projects that need a good steaming.
Essential Blocking Tools: Your Crochet Toolkit
Alright, now that we’ve got our mats sorted, let’s talk about the rest of your blocking toolkit. It’s like Batman’s utility belt, but for crochet.
-
- T-pins: These are the unsung heroes of blocking. They hold your project in place like little soldiers. Just don’t sit on them. Trust me on this one.
-
- Spray bottles: For when you need a light mist rather than a full soak. I use an old empty hair spray bottle. Just make sure you’ve rinsed it well, unless you want your shawl to have extra hold.
-
- Steamers: The big guns of blocking. Great for wool and other animal fibers. I once tried to use my clothes steamer. Let’s just say it ended with a very steamy bathroom and a slightly damp cat.
-
- Measuring tape: Because “eyeballing it” is not a unit of measurement, no matter what my husband says.
-
- Foam rollers: Not for your hair! These are great for blocking long edges or scarves.
Blocking Techniques: A Fiber Story
Different fibers need different blocking techniques. It’s like how you wouldn’t wash your delicates the same way you wash your jeans. (You don’t do that, right? Right??)
Acrylic: The Stubborn Child
Acrylic can be a bit… resistant to blocking. But fear not! Here’s what you do:
-
- Pin it out on your mats
-
- Steam it lightly (emphasis on lightly – too much heat will kill it)
-
- Let it cool completely before unpinning
I once got a bit overzealous with the steamer on an acrylic blanket. Let’s just say it’s now a very fancy, very flat pot holder.
Wool and Animal Fibers: The Drama Queens
These fibers love a good spa day. They respond best to wet blocking:
-
- Soak in cool water with a bit of wool wash
-
- Gently squeeze out excess water (no wringing!)
-
- Pin to your mats and shape
-
- Let air dry completely
The first time I blocked a wool shawl, I was convinced I’d ruined it. It looked like a sad, wet sheep. But once it dried? Pure magic.
Cotton: The Easy-Going Friend
Cotton is pretty chill about blocking. You can wet block it like wool, or you can try spray blocking:
-
- Pin it to your mats
-
- Spray with water until damp
-
- Shape and let dry
I love blocking cotton doilies this way. They come out looking crisp and professional, like something my grandmother would have made (if she hadn’t been too busy teaching me to make mud pies instead).
The Great Blocking Debate: To Block or Not to Block?
Here’s where I might ruffle some feathers: I’m a firm believer that EVERYTHING needs blocking. Yes, even that simple scarf. Yes, even if it’s just for you. It’s like the difference between wearing a wrinkled shirt or a pressed one. Sure, they both do the job, but one looks a whole lot better doing it.
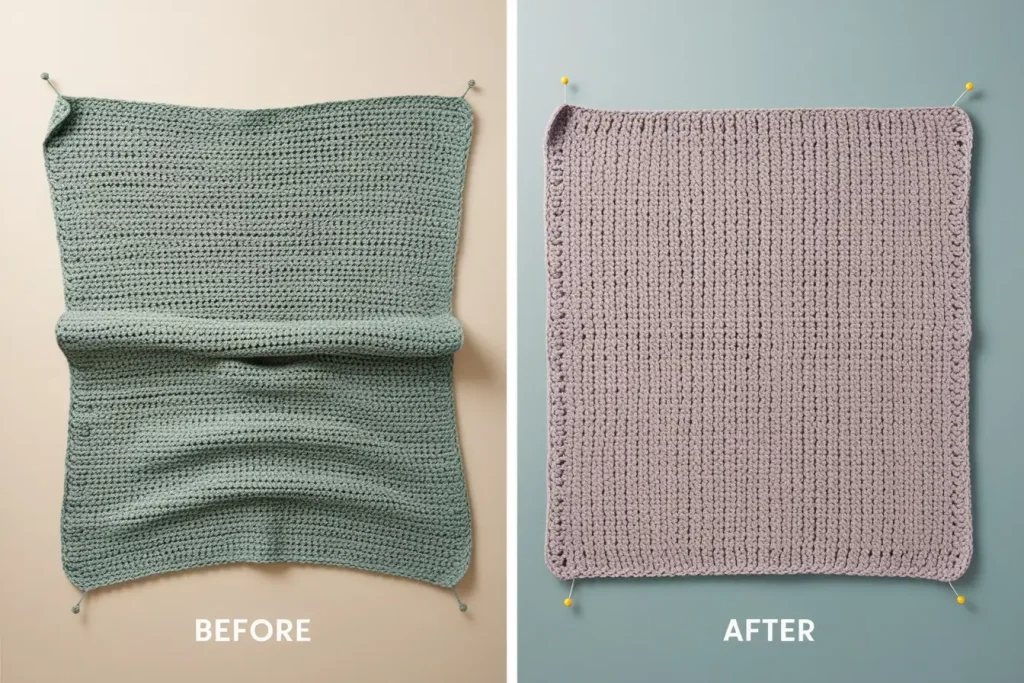
But here’s the thing: blocking is a skill, just like crocheting itself. Your first attempt might not be perfect. You might overstretch something, or not stretch it enough. And that’s okay! Like everything else in crochet, it takes practice.
Remember, at the end of the day, crochet is supposed to be fun. Blocking is just another tool in your toolkit to make your creations shine. So go forth and block, my friends! And if you see me at the craft store, obsessively squeezing every foam mat for density… no you don’t. Mind your business. I’m conducting very important crochet research. For science. Always for science.
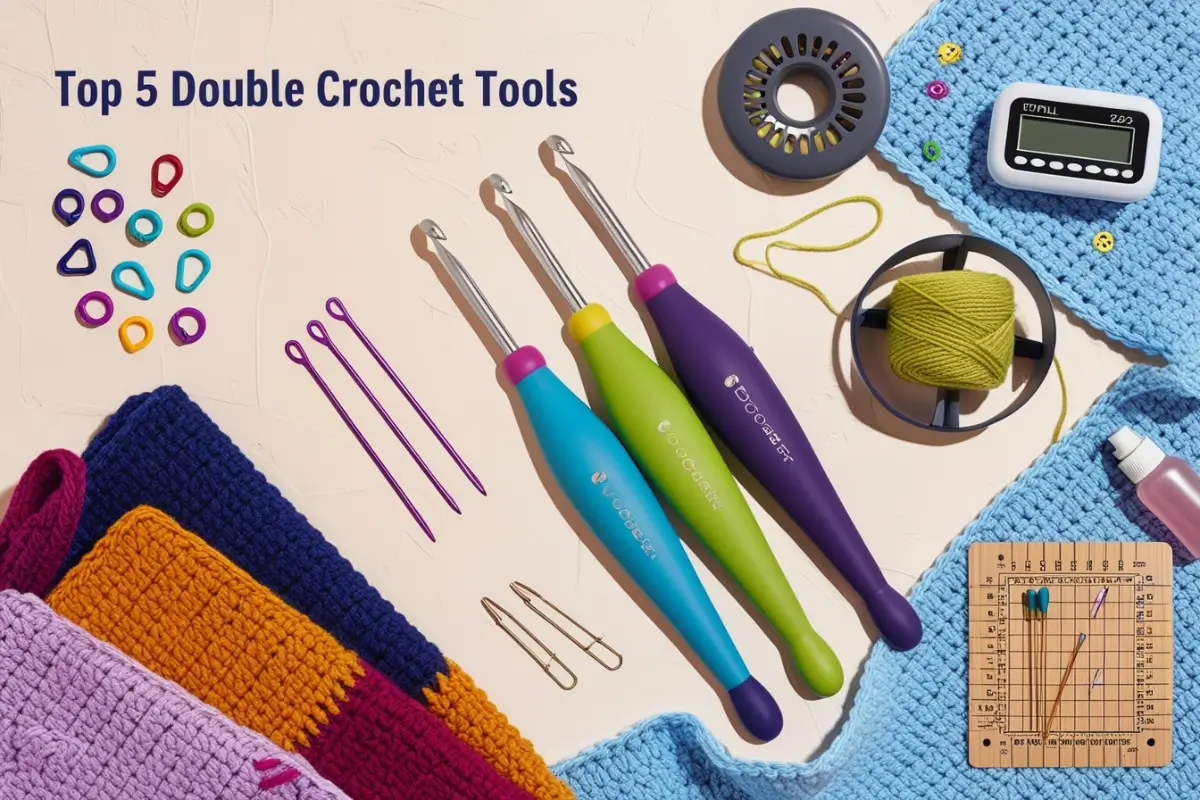
There you have it, crochet comrades – the top 5 double crochet tools that’ll make your 2024 projects shine! From ergonomic hooks that’ll keep your hands happy to blocking mats that’ll give your creations that pro finish, these tools are game-changers. Remember, investing in quality tools is investing in your craft and your enjoyment of it. So, which tool are you most excited to add to your arsenal? Get out there, gear up, and let’s make 2024 the year of stunning double crochet creations!
